How to use Salesforce Copilot Action to Create records using Flow
Salesforce has recently introduced the Prompt Builder and Copilot, two groundbreaking tools that can boost your sales agents’ productivity by up to ten times. In this article, I’ll share my experience using Salesforce Flow and Copilot to create an Opportunity directly from Copilot. With Copilot, you can say goodbye to endless clicking and let Einstein Copilot handle record creation for you.
Requirements for This Action
- Salesforce Org with Einstein Copilot Enabled
- Trigger Flow
Step 1: Building the Flow
First, we need to identify the fields required to create an Opportunity. This will vary based on your business logic. For this demonstration, we’ll use the Opportunity Name, Stage, and Closing Date as the necessary fields.
Create a New Auto-Launched Flow: From Setup, search for Flow and create a new ‘Auto-Launched Flow’.
Create 3 input variables and 1 output variable as follows:
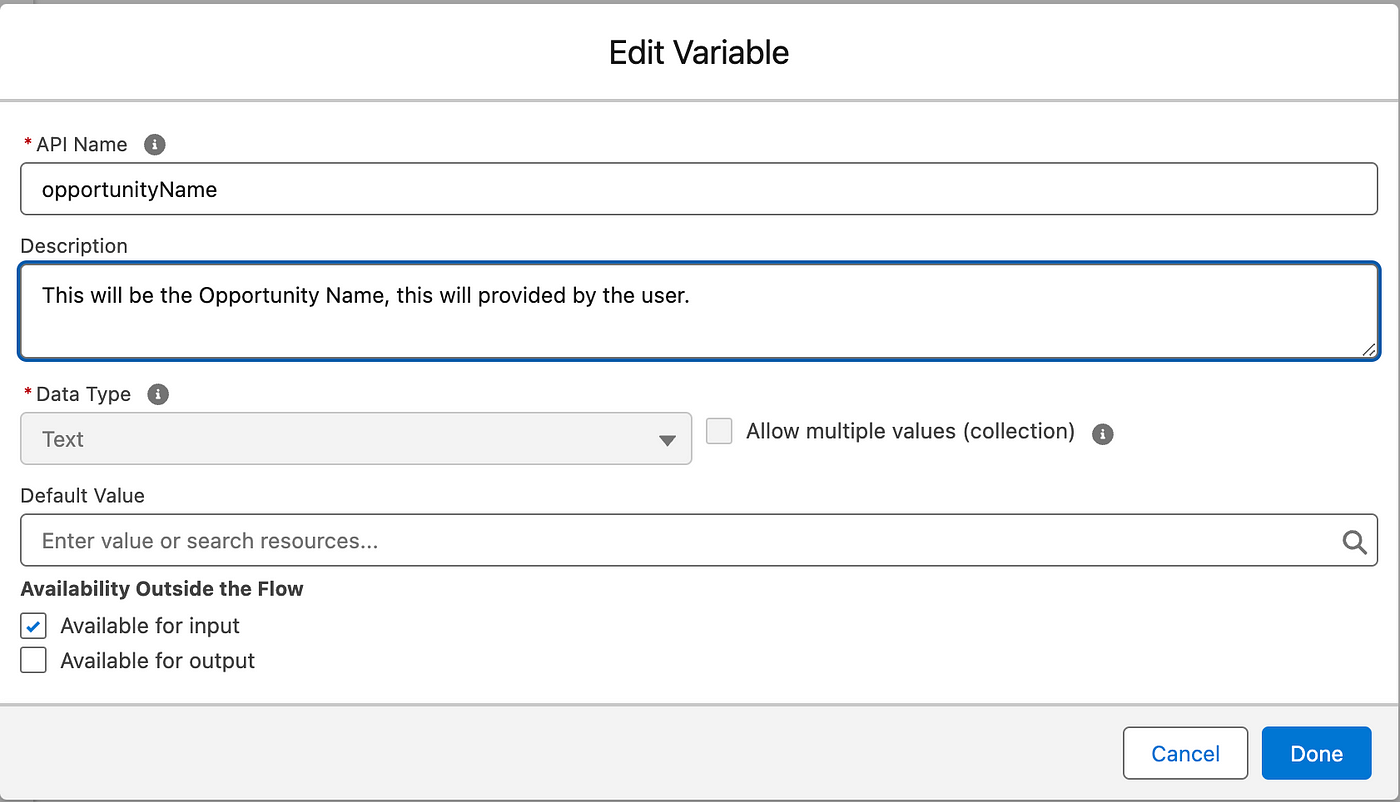
Variable 1:
- API Name:
opportunityName - Type: Text
- Mark as Available for input
- Provide a meaningful description
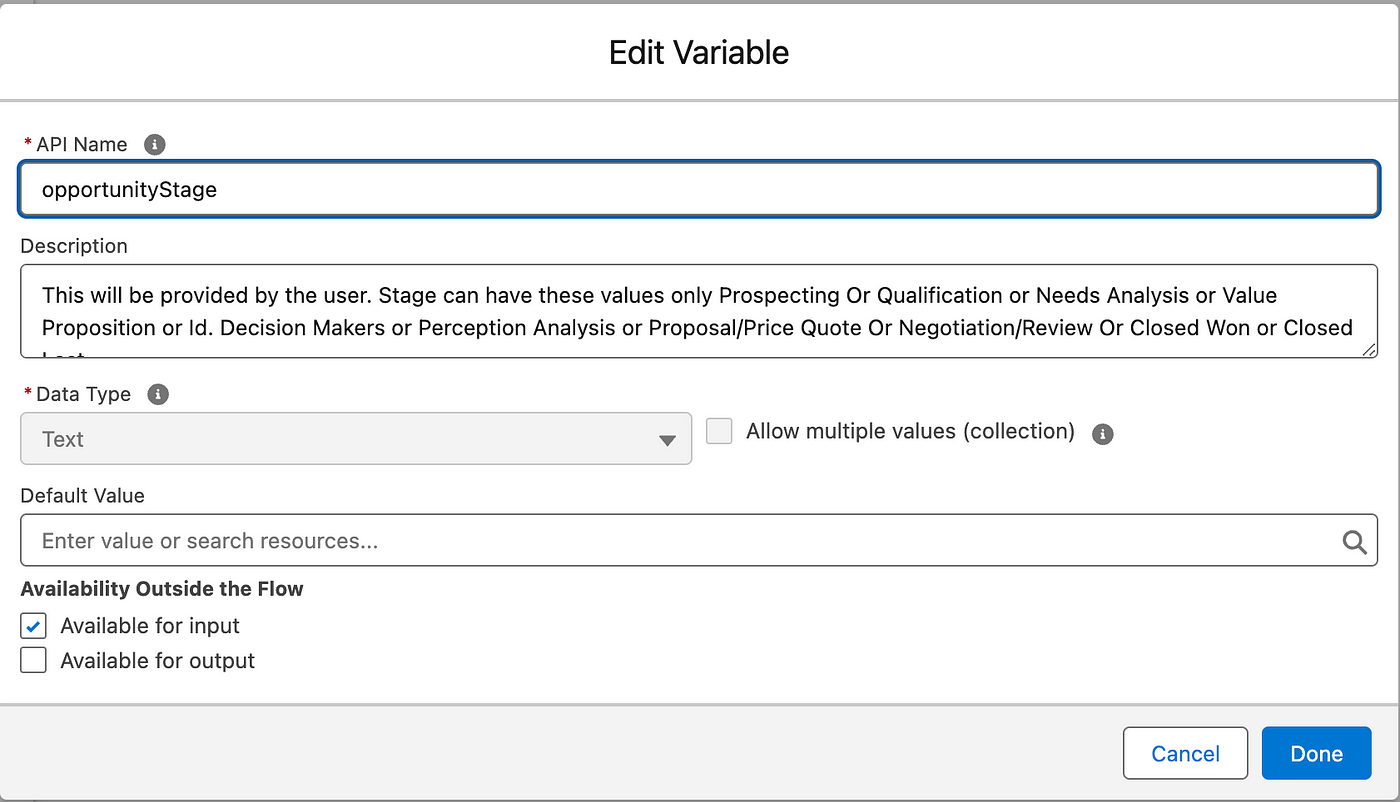
Variable 2:
- API Name:
opportunityStage - Type: Text
- Mark as Available for input
- Provide a meaningful description
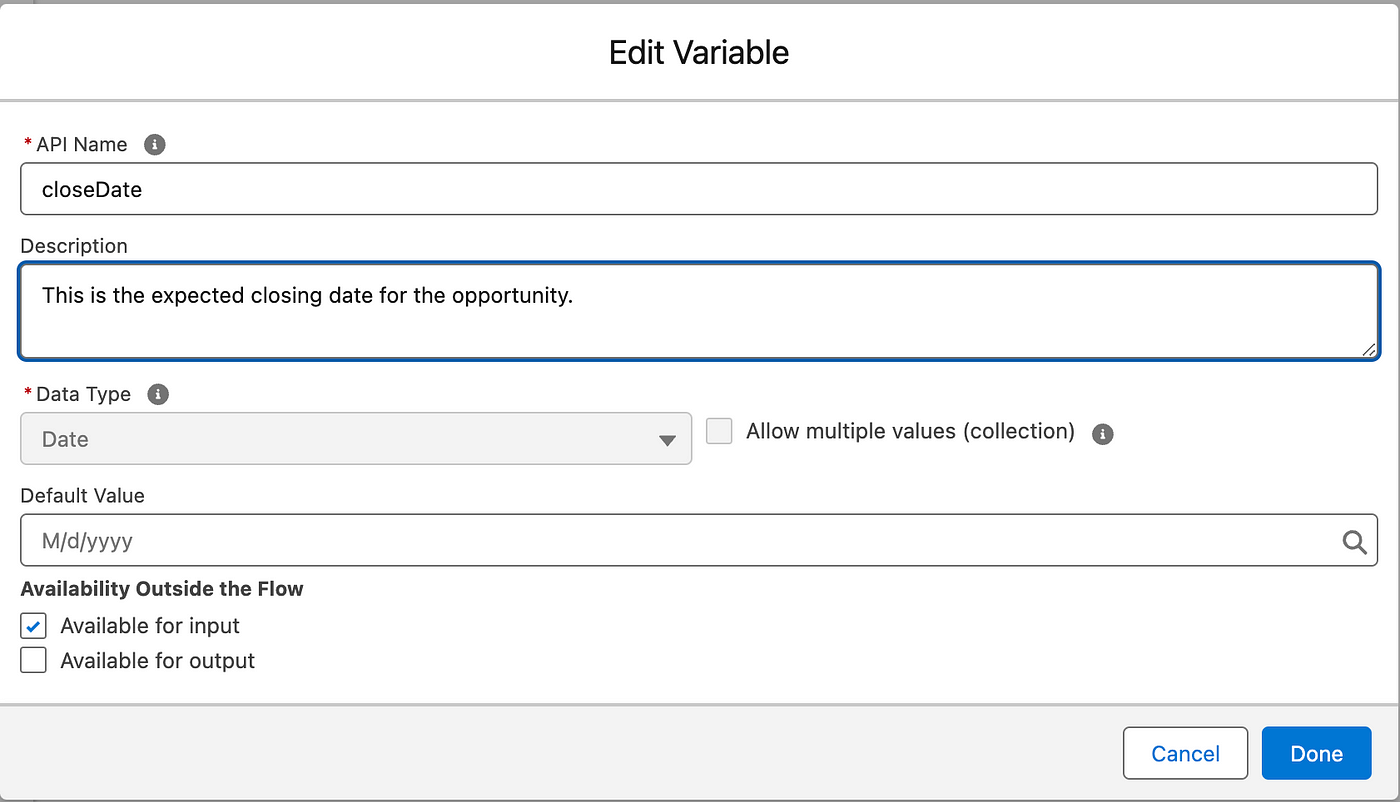
Variable 3:
- API Name:
closeDate - Type: Date
- Mark as Available for input
- Provide a meaningful description
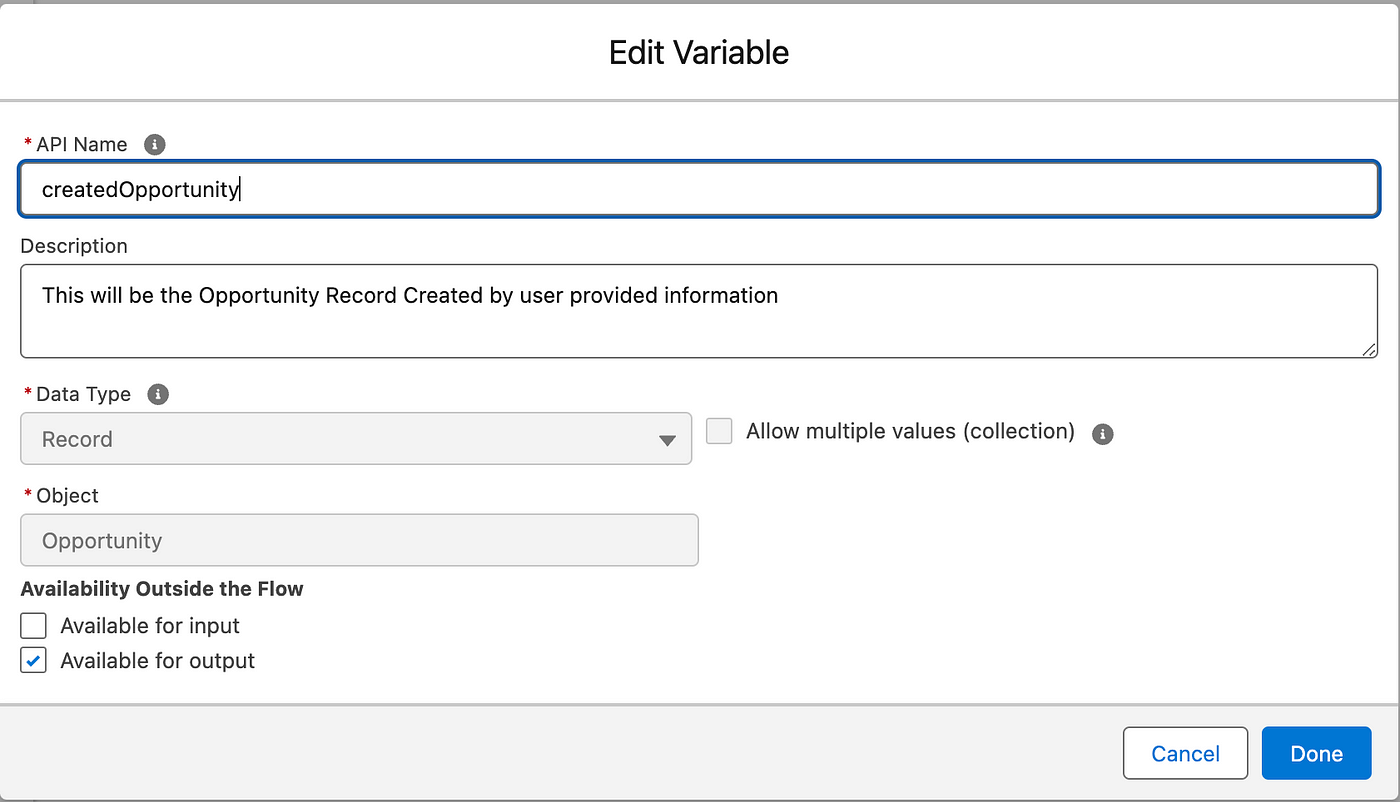
Variable 4:
- API Name:
createdOpportunity - Type: Record (Opportunity)
- Mark as Available for output
- Provide a meaningful description
Use a Create block to create an Opportunity with the first 3 variables, and store the created Opportunity in the 4th variable.
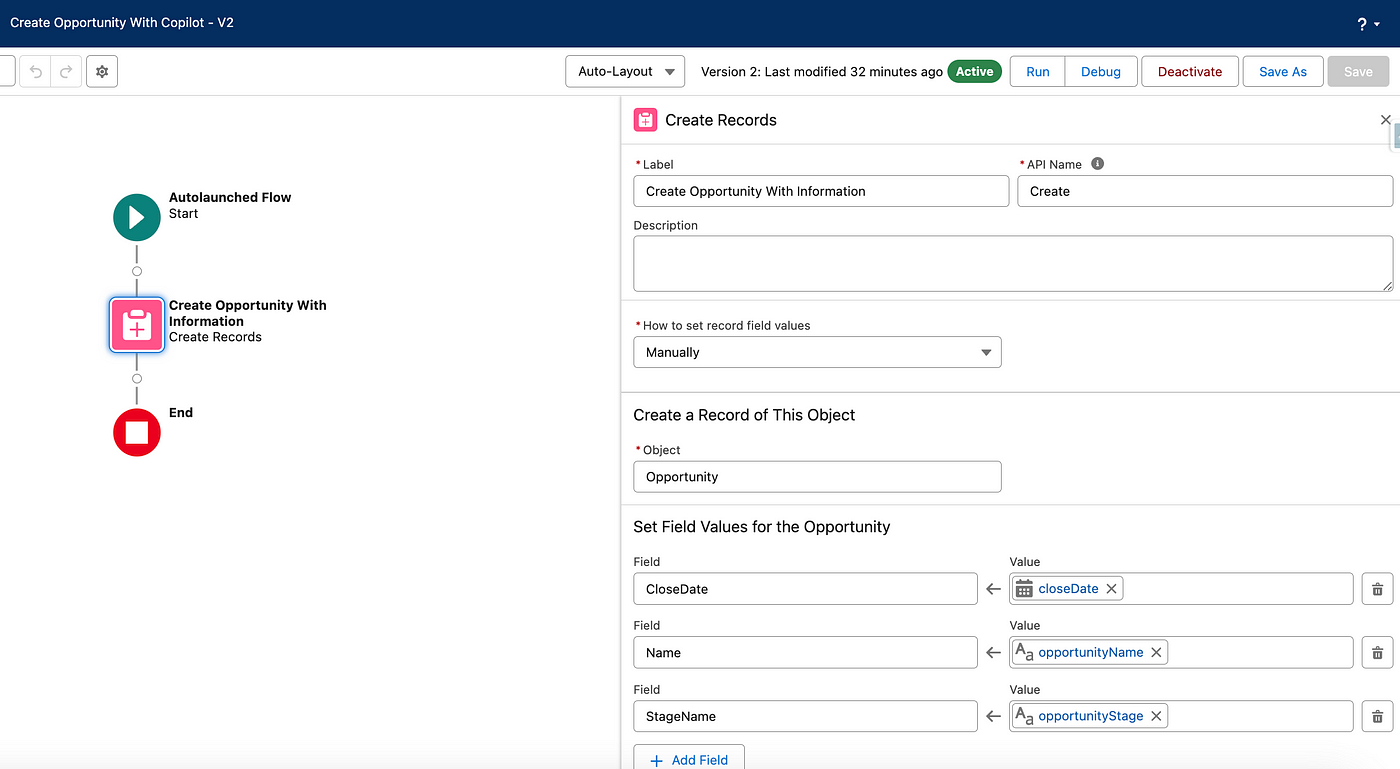
Make sure you are following all best practices to create the flow, I just build a demo flow.
Step 2: Create Copilot Action
With the flow ready, let’s create a Copilot Action using this flow:
- In Setup, search for Einstein Copilot Actions.
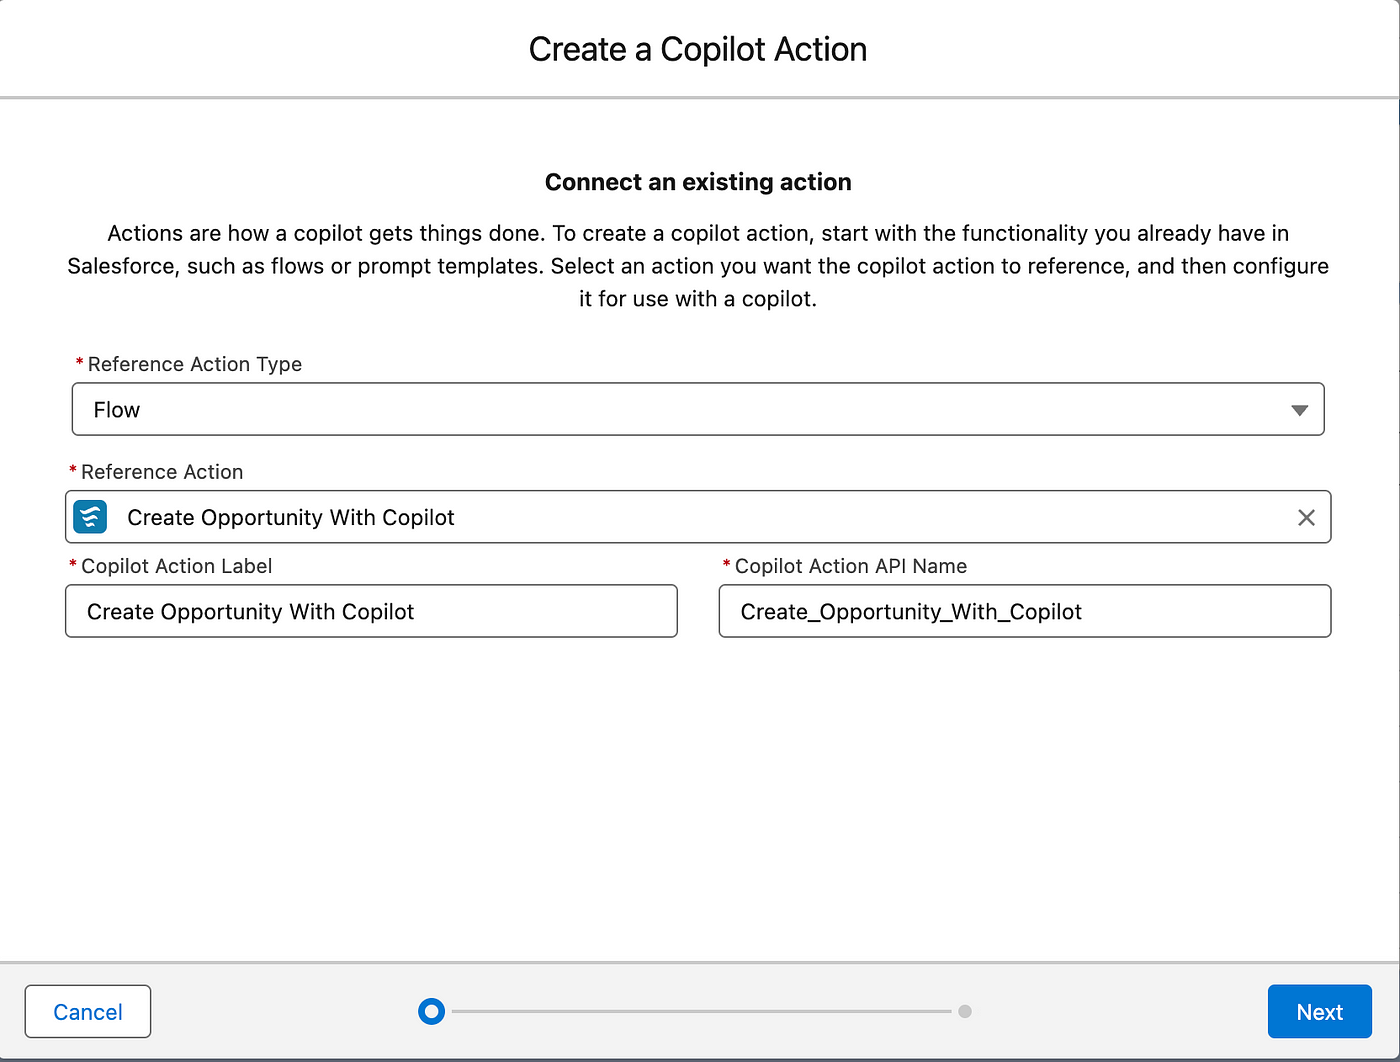
- Click on New Copilot Action, select Flow, and choose the flow we just created.
- Ensure you mark ‘Require input’ for all inputs and ‘Show in conversation’ for the output.
Step 3: Assign the Copilot Action to Copilot
To assign the newly created Copilot Action to the Copilot:
- Search for ‘Einstein Copilots’ in Setup.
- Click on the Copilot and open it in Builder.
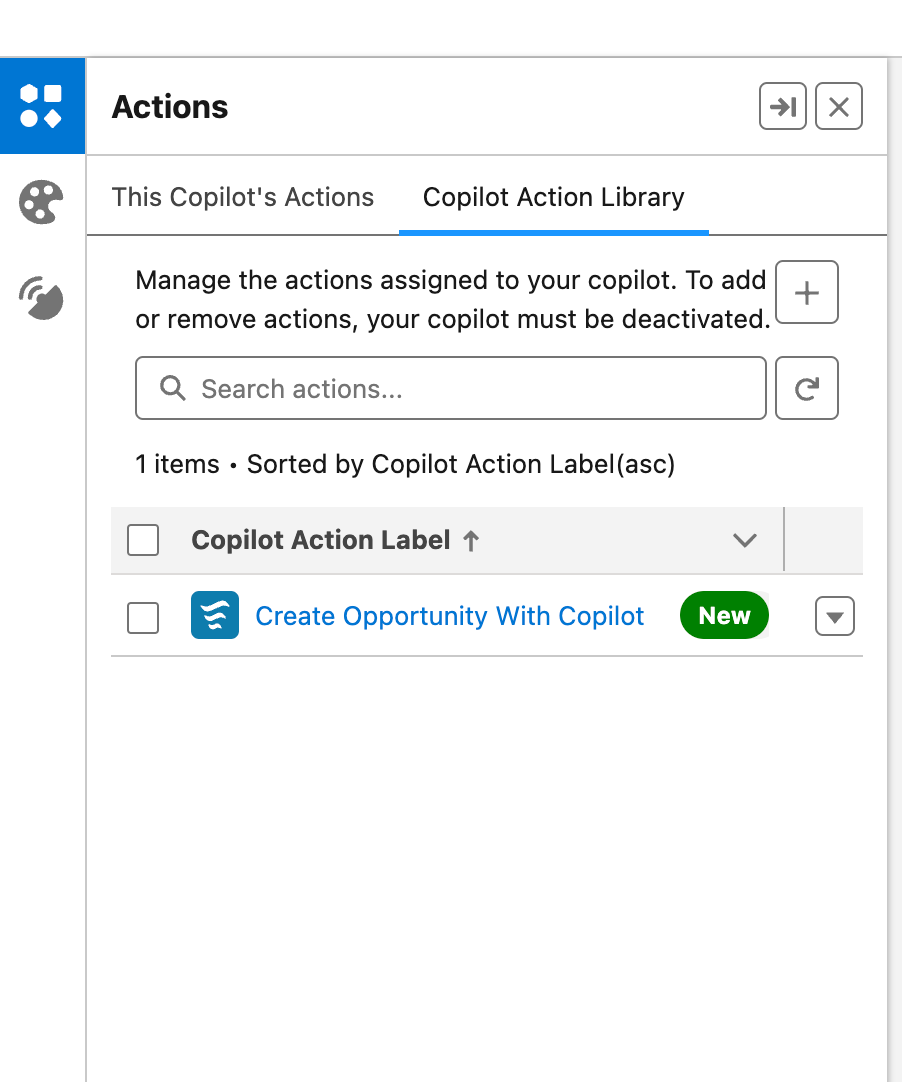
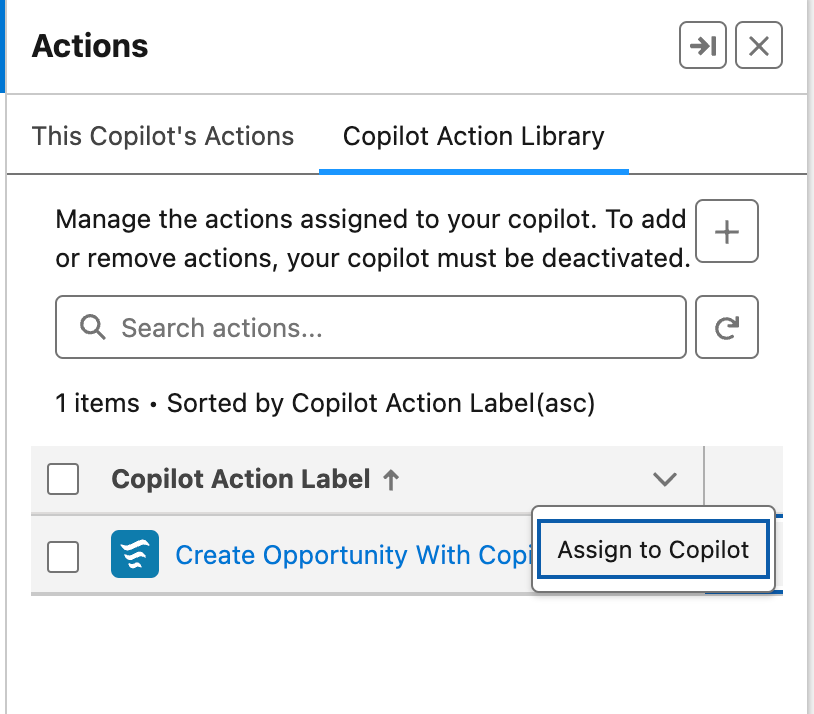
- Deactivate the Copilot, find your Copilot Action in the Copilot Action Library, and assign it to the Copilot.
- Reactivate the Copilot.
Step 4: Test the New Action
Finally, test the new action:
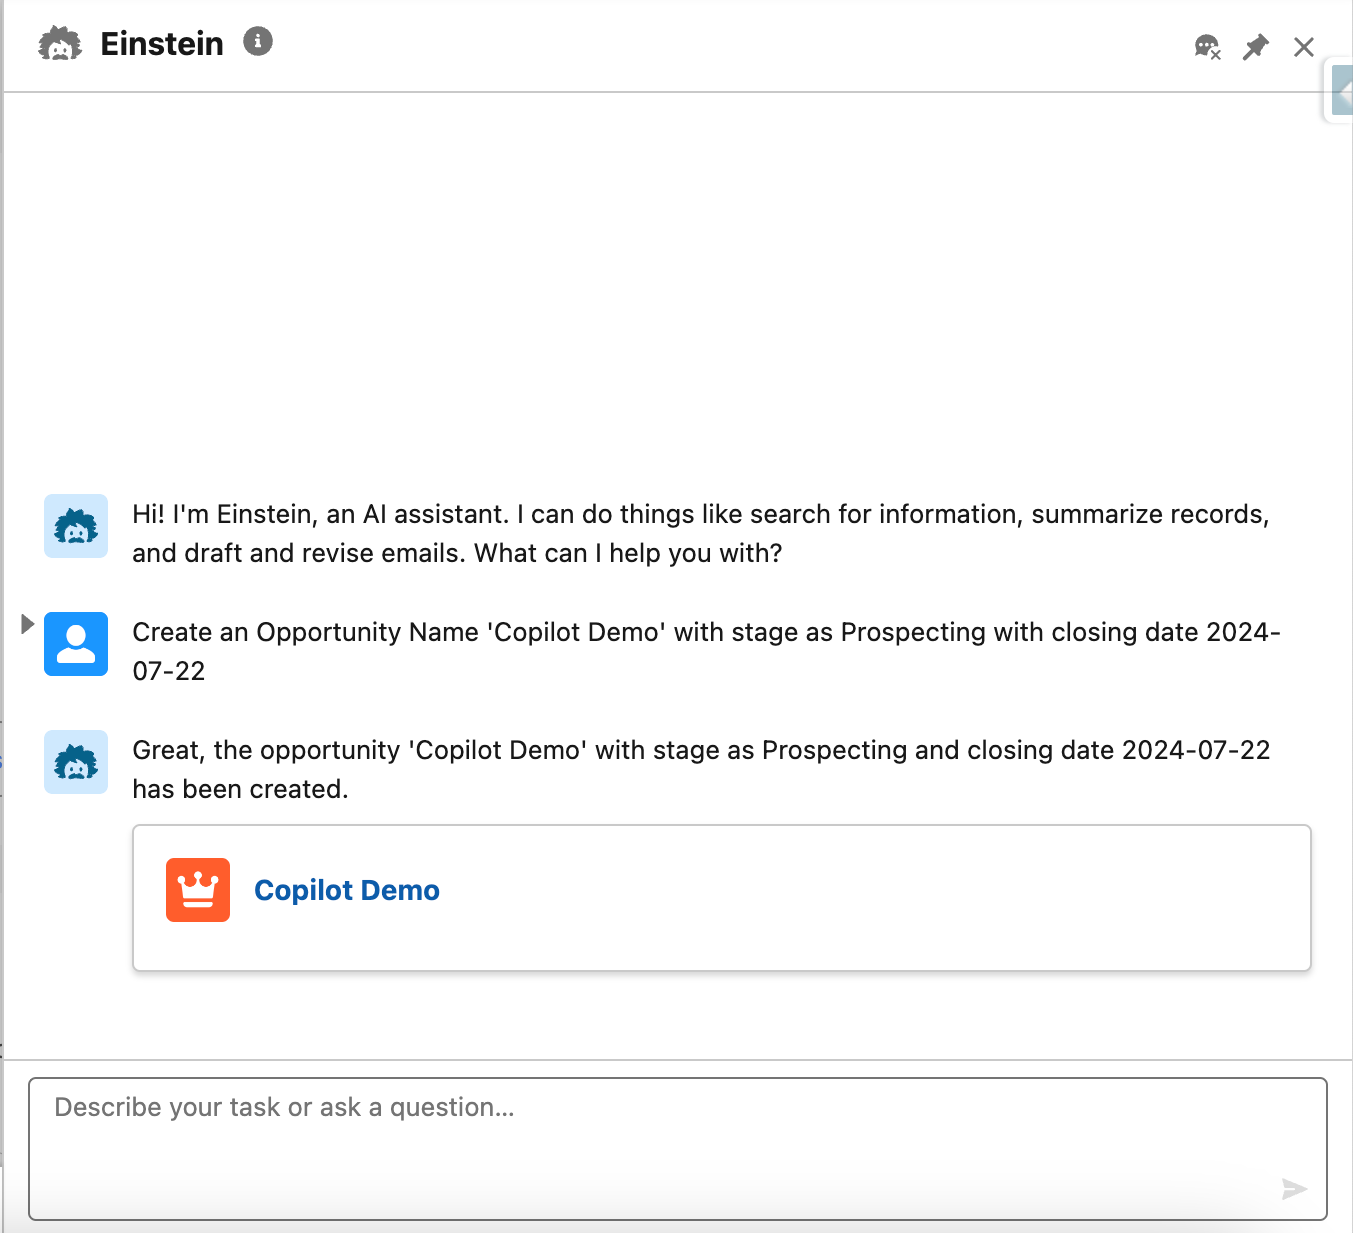
- In your Salesforce home, click on the Einstein icon in the top right.
- Use this prompt: “Create an Opportunity named ‘Copilot Demo’ with stage as Prospecting and closing date 2024–07–22.”
- If everything is set up correctly, Copilot will create a new Opportunity with the provided information. Click on the Opportunity to verify its details.
Conclusion
I hope my learning experience helps you build new actions with Copilot. If you have any questions, feel free to connect with me on LinkedIn.
Happy Learning!

Hello!
Good cheer to all on this beautiful day!!!!!
Good luck 🙂